


What’s a Raspberry Pi?
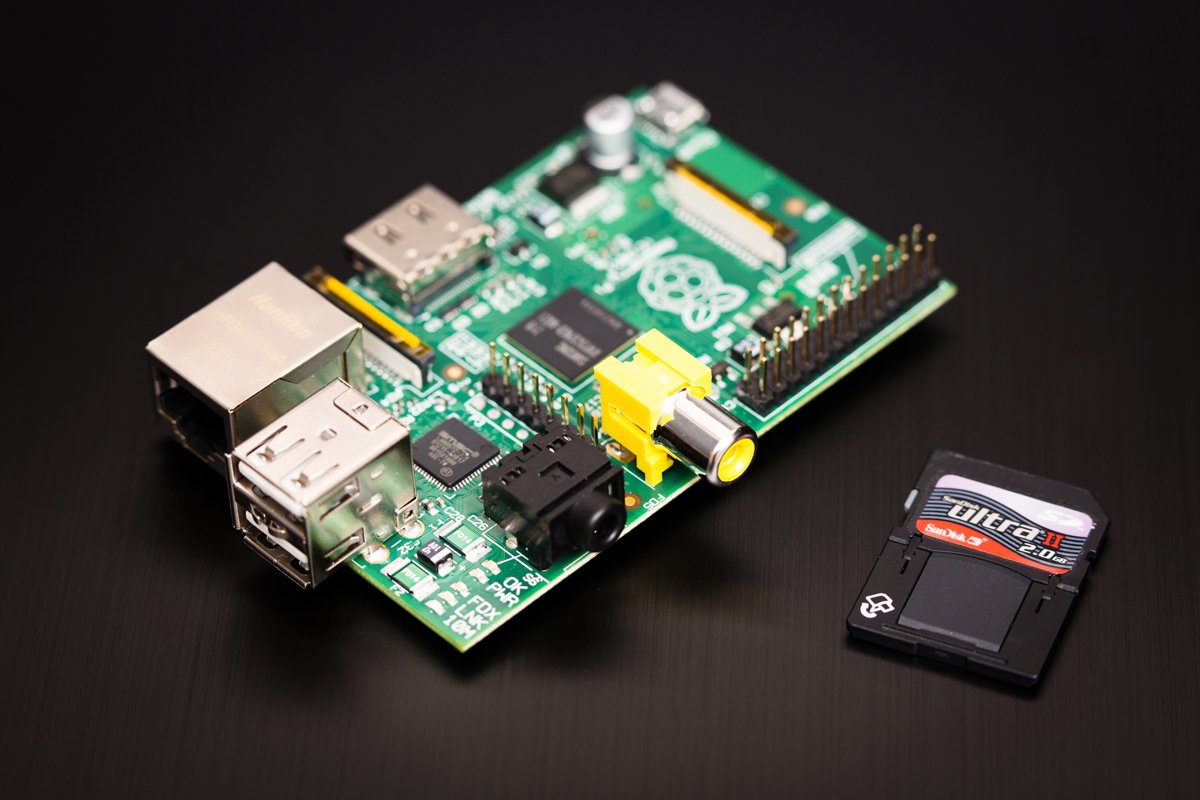
The Raspberry Pi is a tiny computer that’s small enough to fit in your pocket just like your credit card or ID card. For about Rs.3500, you get a bare board computer with HDMI and analog composite video output. You can add up to two USB devices (which, in most cases, will be a mouse and keyboard) and connect it to the internet via wired Ethernet (LAN). The Raspberry Pi is powerful and inexpensive, allowing you to create a home media center, internet radio, or even your own VPN server on the cheap. That said, a little setup and a lot of other parts are required to get it up and running. In this post we’ll take a look at how to get a Raspberry Pi set up so you can start using it for a variety of purposes.
What You’ll Need
The Raspberry Pi may be a computer all on its own, but you’ll still need a lot of other things to make it work:
- A Raspberry Pi: If you’re not sure where to buy one, you’ll find links below to help you out.
- An HDMI- or composite video-capable television or monitor: In this post we’ll be working with an HDMI-capable monitor/TV, because it offers better resolution and built-in sound. Another way is to use a VGA Monitor connected through an HDMI to VGA Converter Cable However, you can use analog if you want by connecting an old TV or any other display capable of showing video from RCA video cable input.
- An HDMI or composite video cable: You’ll need this cable to connect your Raspberry Pi to your television or monitor.
- A 4GB Class 4 SD card (or better) and a card reader (if you don’t have one built into your computer. Most laptops are equipped with Memory card reader): Most SD cards will work, but some aren’t compatible and will therefore cause issues. You can find out which cards are compatible, or locate a place to buy a compatible card with an operating system pre-installed, on this page.
- A USB keyboard and mouse: Any standard USB keyboard or mouse will do. A wireless keyboard and mouse also may work well. It is recommended use the standard USB keyboard and mouse if you are setting up your Raspberry Pi for the first time.
- An Ethernet cable: Any standard Ethernet cable will do. You only need this to connect to your network and the internet, however, so you can leave this item out if desired.
- A good quality, micro USB power supply that can provide at least 700mA at 5V: Most modern smartphone chargers supply 700mA at 5V, but not all do. Check the bottom of your charger and look for a block of text. You’ll see its output values in that text which may read 0.7A instead of 700mA). If it offers at least that much power, you’re probably good to go. Just don’t use a poor quality charger or you may run into problems. I personally suggest to use 1A rated power supply for your Pi.
- A 3.5mm stereo audio cable: You only need this if you’re using analog video or your HDMI connection does not support audio and want to connect your Raspberry Pi to a set of external speakers or internal ones on your television or monitor.
You can find the majority of those items pretty much anywhere, but Raspberry Pi units are difficult to come by due to popular demand. Here are a few places to try that often have a few in stock,
Once you’ve got your Raspberry Pi, you can start setting it up!
How to Set Up Your Raspberry Pi with a Basic Operating System?
If you’re a beginner with a Raspberry Pi, things just got a whole lot easier.
NOOBS is incredibly simple to use. Just burn the image to an SD card (definitely we’ll see it in detail later), and put the SD card into your Raspberry Pi. When you boot it up, you’re given a choice of operating systems to install, including ArchLInux, OpenELEC, Pidora, RaspBMC, Raspbian, and RiscOS. All you need to do is pick your operating system, and NOOBS does the rest, including partitioning, setup, and more. The best part is that NOOBS stays on your SD card, so if things go wrong you can load up NOOBS at any time to reinstall an OS. Basically, this is now the easiest way to get started with the Raspberry Pi, and you hardly need any experience to get started.
NOOBS is a way to make setting up a Raspberry Pi for the first time much, much easier. You won’t need network access, and you won’t need to download any special imaging software. Just head to the downloads page, grab a copy of the NOOBS zip file, and unpack it onto a freshly formatted 4GB (or larger) SD card. Connect your micro USB Power Adaptor to Raspberry Pi and switch it on.
Note: Please DO NOT connect your Raspberry Pi to your Desktop PC or Laptop through micro USB port to power up the Pi. It needs at least 700mA current and your PC/Laptop cannot deliver that much current through the USB ports.
When you boot up for the first time, you’ll see a menu prompting you to install one of several operating systems into the free space on the card. The choice means you can boot the Pi with a regular operating system like Raspbian, or with a media-centre specific OS like RaspBMC.
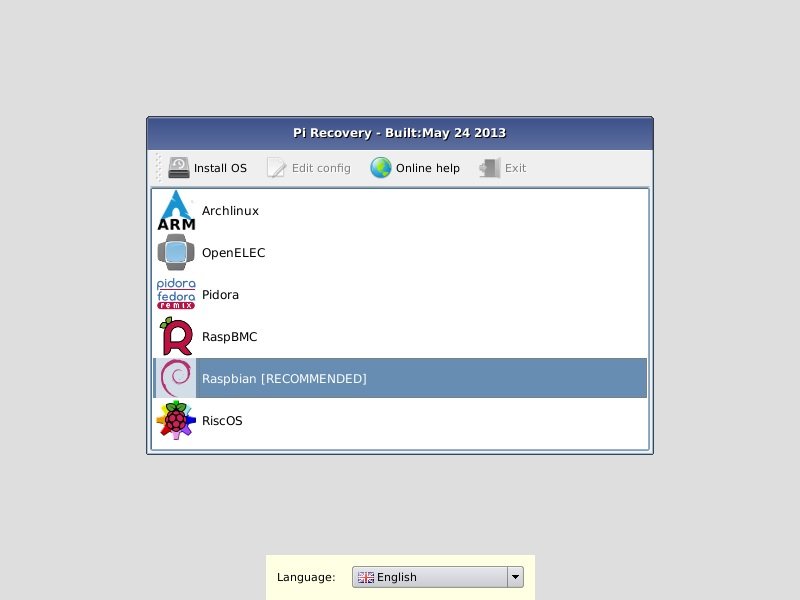 The main OS selection menu
Once you’ve installed an operating system, your Pi will boot as normal. However, NOOBS stays resident on your card, so by holding shift down during boot you can return to the recovery interface. This allows you to switch to a different operating system, or overwrite a corrupted card with a fresh install of the current one; it also provides a handy tool to let you edit the config.txt configuration file for the currently installed operating system, and even a web browser so you can visit the forums or Google for pointers if you get stuck.
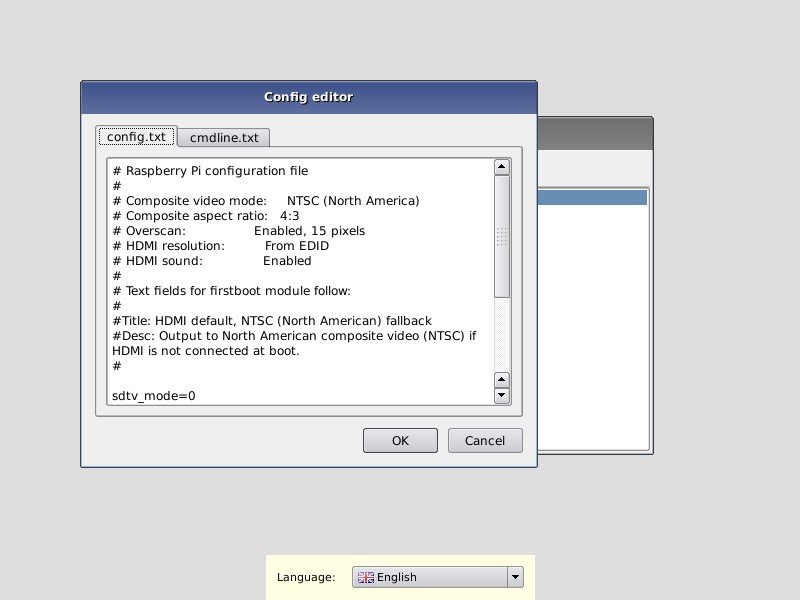
Editing config.txt

Viewing the forums in the Arora browser
Things are pretty much forward from here onward. Have a coffee or tea while your Pi is setting up itself and then you are ready to go!
Installing Raspbian without NOOBS
You can use the Raspberry Pi for all sorts of different things—some of which may require their own special operating systems—but to start out, it’s a good idea to get acquainted with the Pi by installing Raspbian, a Raspberry Pi-focused version of Linux. Earlier, we have seen how easy it is to install an OS using NOOBS. But, at some point you may want to install an OS manually by yourself for various reasons. Here we want to show how you can do it without NOOBS. Here’s what you need to do.
Step 1: Prepare Your SD Card
First things first, you need to prepare the SD card for the Raspberry Pi. This involves formatting it properly and putting Raspbian. Use SD card formatting tool which can be downloaded from the SD association website. The steps vary depending on whether or not you’re on a Mac, Linux, or Windows PC, but we’ll walk you through the process using the Windows PC.
- Download the latest version of Raspbian and unzip the .img file inside. (It’s almost 500MB so it may take a little while to download.)
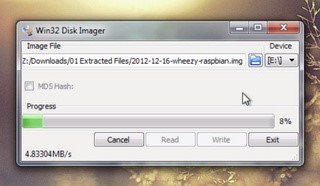
- Download Win32DiskImager and unzip the application (.exe file) inside.
- Insert your SD card into your Windows PC using a card reader.
- Open Win32DiskImager.exe, the application you just downloaded, by double-clicking on it. If you’re running Windows 7 or 8, right click on it and choose “Run as Administrator” instead.
- If your SD card isn’t automatically detected by the application, click on the drop-down menu at the top right (labelled “Device”) and choose it from the list. Make sure you have selected the correct drive letter if you’ve more than one media devices attached to PC. Double check before you proceed further!
- In the image file section of the application, click the little folder icon and choose the Raspbian .img file you just downloaded.
- Click the Write button and wait for Win32DiskImager to do its thing. When it finishes, you can safely eject your SD card and insert it into your Raspberry Pi.
Step 2: Power Up Your Raspberry Pi
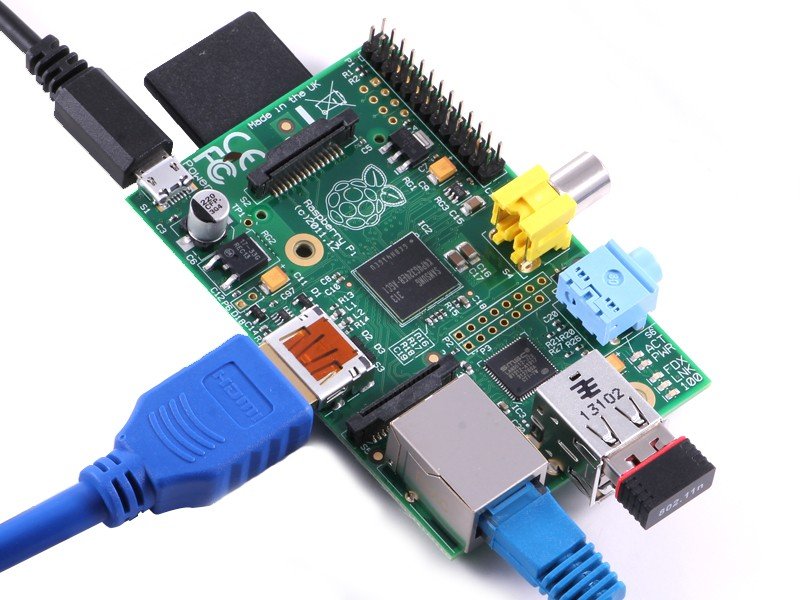
Connecting everything to your Raspberry Pi is pretty easy. Start by connecting the HDMI cable from the unit to your television (or monitor). If you’re using the analog composite video connection instead, connect it to your television (or monitor) and plug in a set of speakers to the 3.5mm audio jack. If you only have a VGA computer monitor, then you connect it through a HDMI-to-VGA Converter Cable. If you want your Raspberry Pi to connect to your network and/or the internet, use an Ethernet cable to connect it to your router. If you’ve set up a computer before, this should all seem familiar.
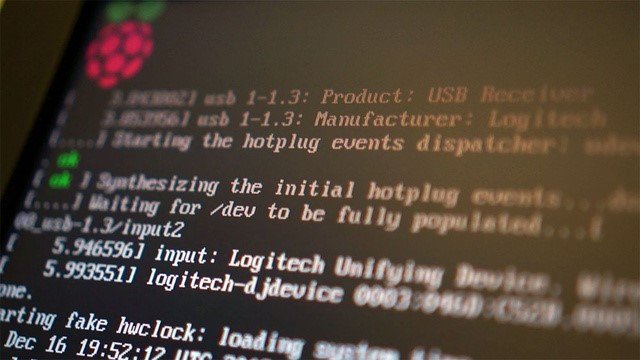
Finally, you need to connect your Raspberry Pi with a micro USB power adapter. As mentioned earlier, you need an adapter that can provide at least 700mA at 5V. When you have a compatible power adapter on hand, connect it to a micro USB cable and then connect that cable to the micro USB port on your Raspberry Pi unit. It’ll turn on all by itself and you should see it boot for the first time.
Step 3: Configure Your Raspberry Pi
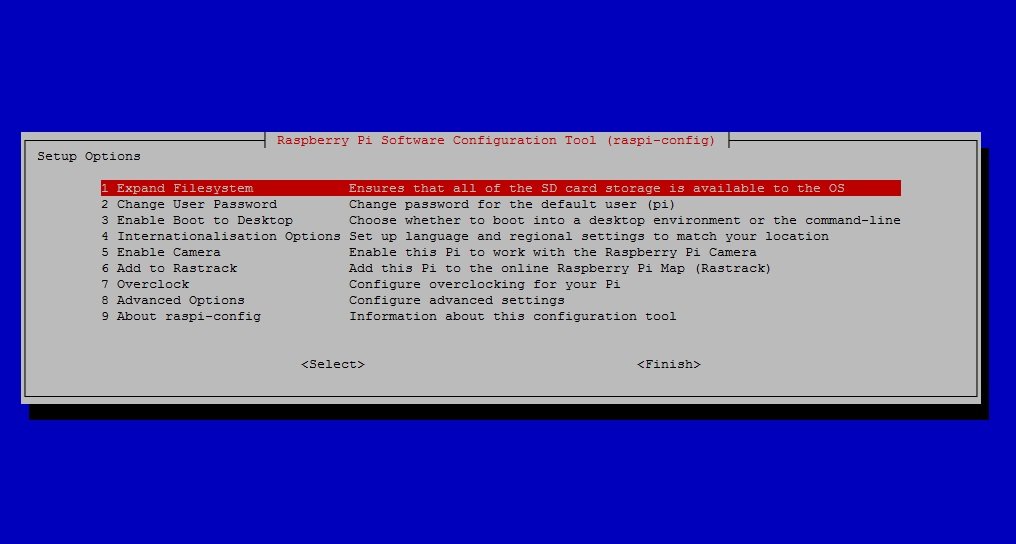
Once your Raspberry Pi boots for the first time you’ll need to configure a few things. You’ll know it’s ready for you when you see a Raspi-config window with a pretty big list of settings. You can mess with the others if you feel so inclined, but the only thing you really need to do is expand the file system so you can use up all the space on your SD card. To do so, follow these steps,
- Select expand_rootfs or Expand File System (depending on the Raspbian OS version you have) and press enter.
- Confirm that you want to expand the file system and let Raspbian do its thing.
- When you’re returned to the configuration list, go all the way to the bottom and select the Finish option.
- It’ll ask you if you want to reboot. Choose yes.
 Your Raspberry Pi will reboot and take a little longer this time because it needs to expand the file system. After about a minute you’ll be asked to log in. You’ll need to use the default username and password:
Username: pi
Password: raspberry
Once you’ve logged in, you’ve got yourself a working Raspberry Pi. Congratulations!